Photography by the Yard: My Journey into Cirkut Photography
The Cirkut camera is a rotating panoramic camera used primarily in the early 20th century to produce sweeping, yard-long photographs of towns, factories, landscapes, and large groups. Using a clockwork motor, it rotates while exposing a continuous roll of film, creating images unlike those made with conventional cameras. A small number of photographers continued using Cirkut panoramic cameras commercially into the early 2000s for school groups, conventions, car clubs, and events.
More than a century since this unique camera’s introduction, Cirkut panoramic photographs still surface in archives, antique shops, and family collections—often raising the question: how were they made?
Discovering the Cirkut
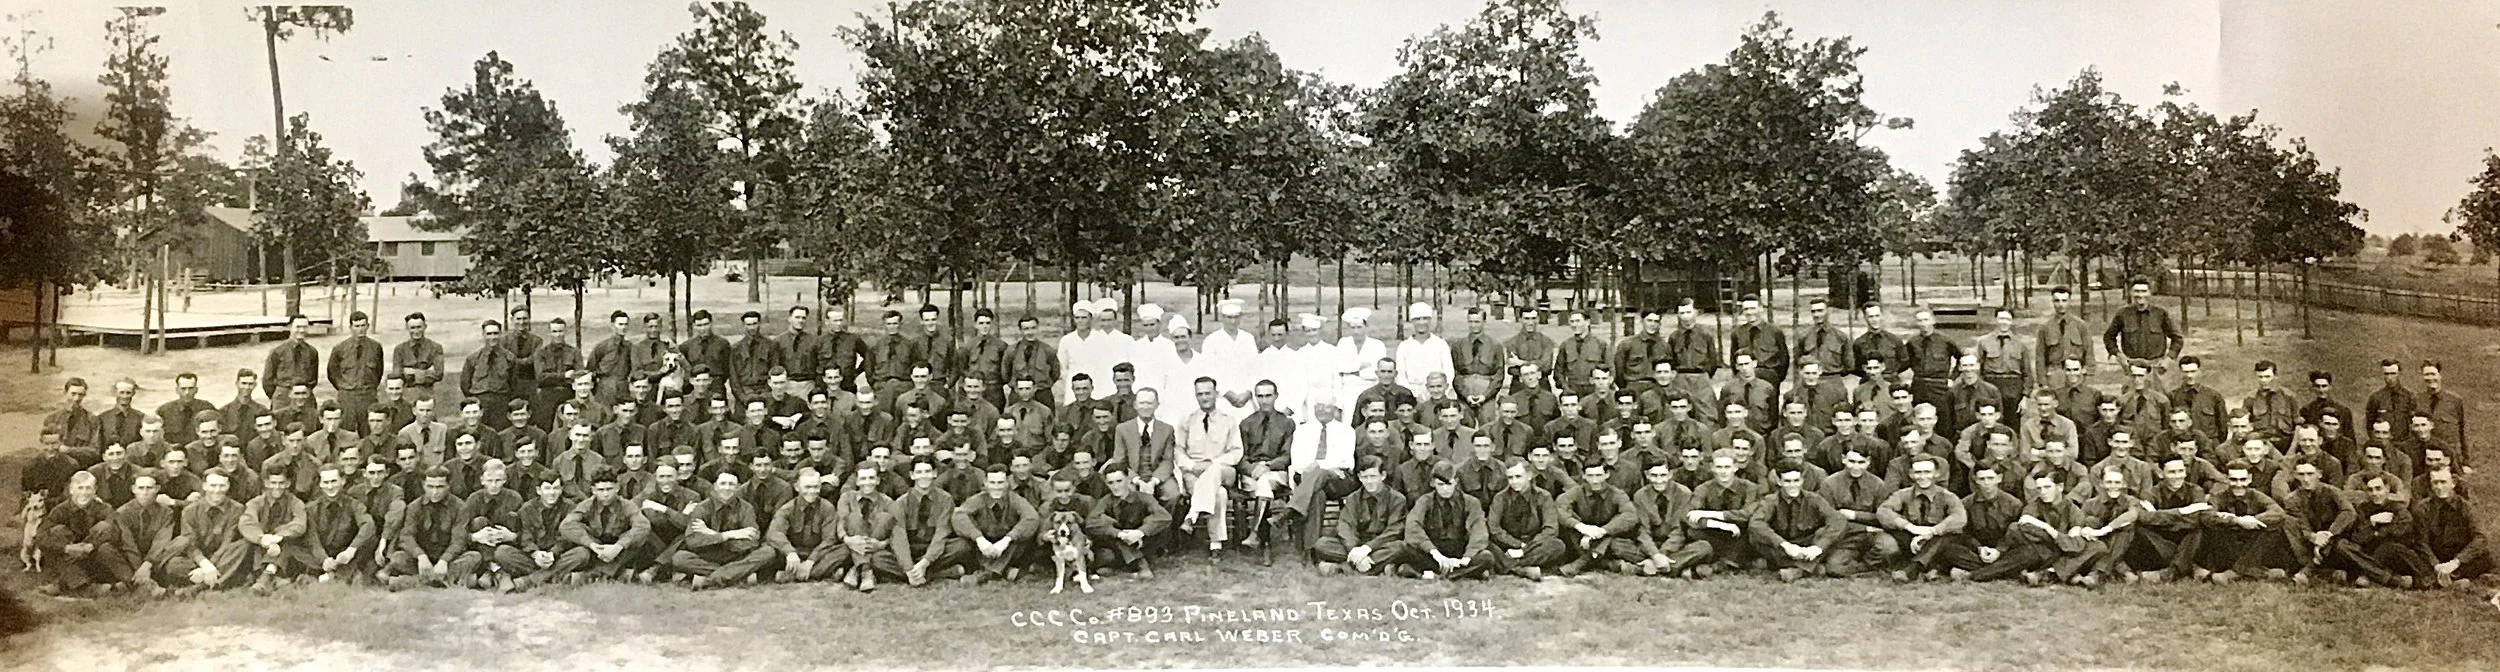
A Cirkut panoramic photograph from my own family’s archive. Civilian Conservation Corps. Co. #893 in Pineland, Texas, October 1934. My grandfather, Eldridge D. West, is seventh from the left in the back row. The photo was taken by E.L. Rothwell, who worked for Euguene Goldbeck’s National Photo & News Service.
Many of the historic panoramic photographs people encounter today—especially large group or industrial images—were made with the Cirkut. Detailed histories of the Cirkut have appeared in the Graflex Journal—most recently by Ken Metcalf in 2023 and Bill McBride in 2009. McBride’s detailed essays also ran in the newsletters of the International Association of Panoramic Photographers, which once counted dozens of Cirkut photographers among its ranks. Those articles provide a relatively thorough historical record. Introduced in 1904 and offered through the 1940s, the Cirkut family of cameras came in various sizes: the No. 5, No. 6, No. 8, No. 10, and rarely, the No. 16. The number refers to the maximum width of roll film the camera would accept. The most popular model was the No. 10, of which McBride estimated 1,500 were made. The No. 10 could take film up to 10 inches wide in rolls up to 12 feet long, though 6-foot rolls were most common.
What I want to share here is not another history lesson, but my own experience—more than 120 years after the Cirkut camera’s introduction—of learning to use one, and of finding myself drawn deeper and deeper into the peculiar challenges and rewards of “photography by the yard.”

Oswald, West Virginia, July 1942, Night Crew, by Red Ribble
I got my start in photography as a writer and photojournalist at The Pocahontas Times, a small family-owned newspaper in Pocahontas County, West Virginia, between 2004 and 2013. There I met Doug Chadwick, a long-time panoramic photographer. Around 1979 Doug had been working with photographer Mark Crabtree on a project to preserve and show Cirkut photographs made by Rufus “Red” Ribble. Born May 14, 1878, near Blacksburg, Virginia, Ribble moved near Mount Hope, West Virginia, in the 1920s and began a career as coalfield photographer. Through the 1950s, Ribble used a No. 8 Cirkut Outfit to photograph West Virginia’s miners and coal communities. Ribble’s sweeping group portraits of miners became treasured keepsakes in families throughout the coalfields.
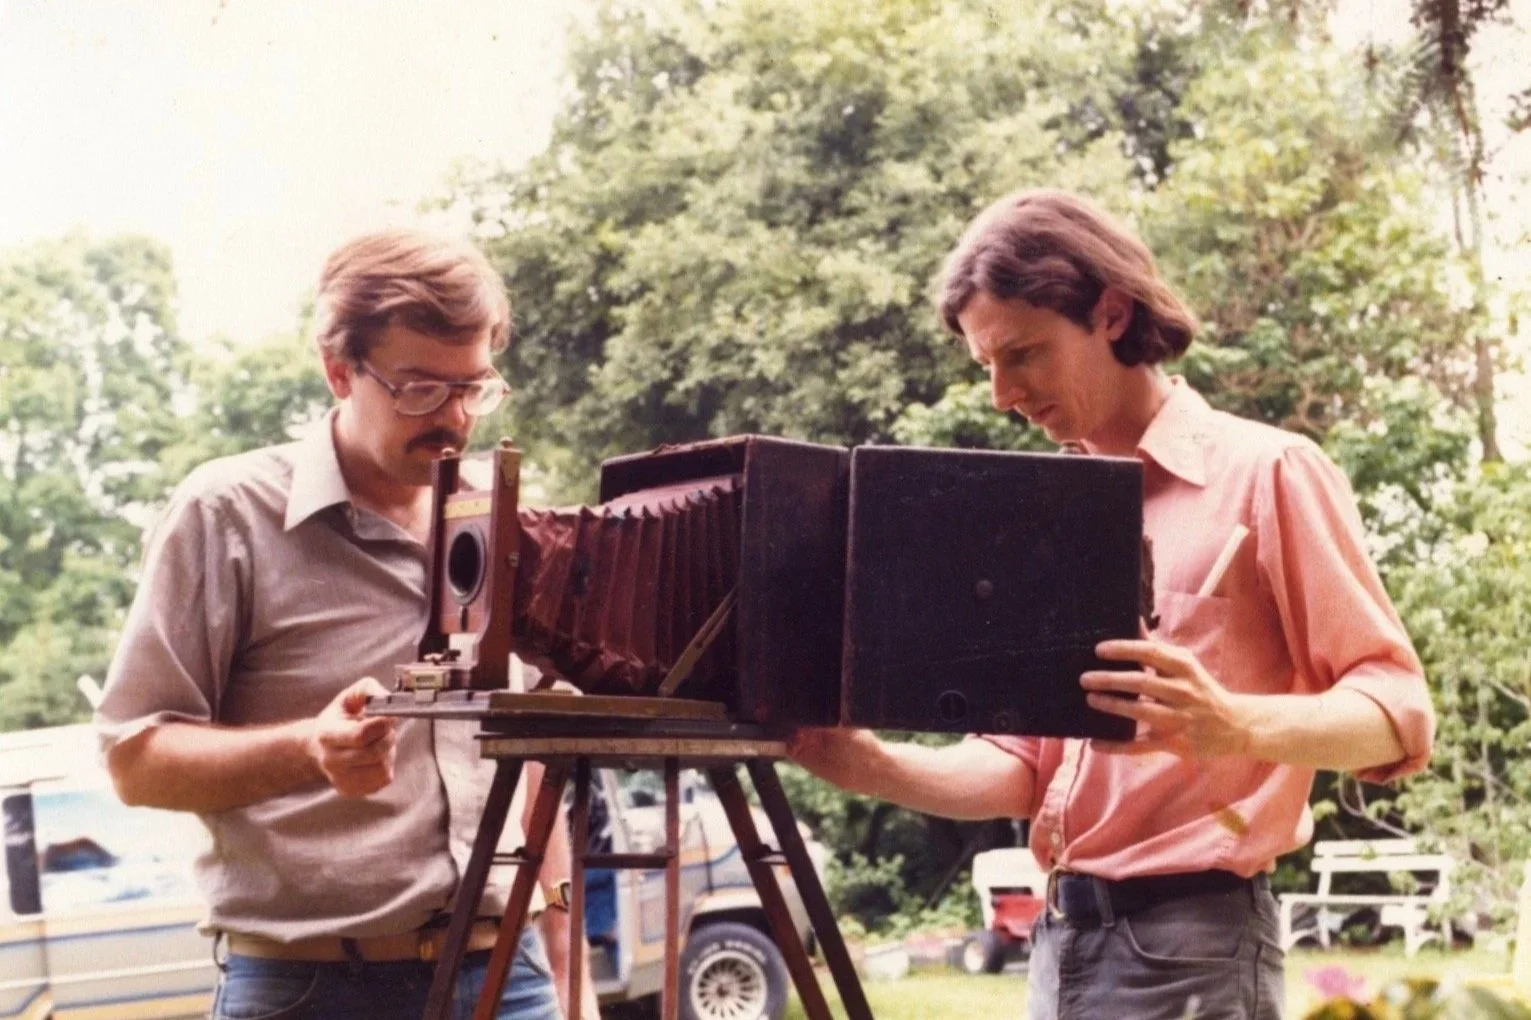
Mark Crabtree and Doug Chadwick inspect Red Ribble's No. 8 Cirkut Camera in Pax, West Virginia around 1979.
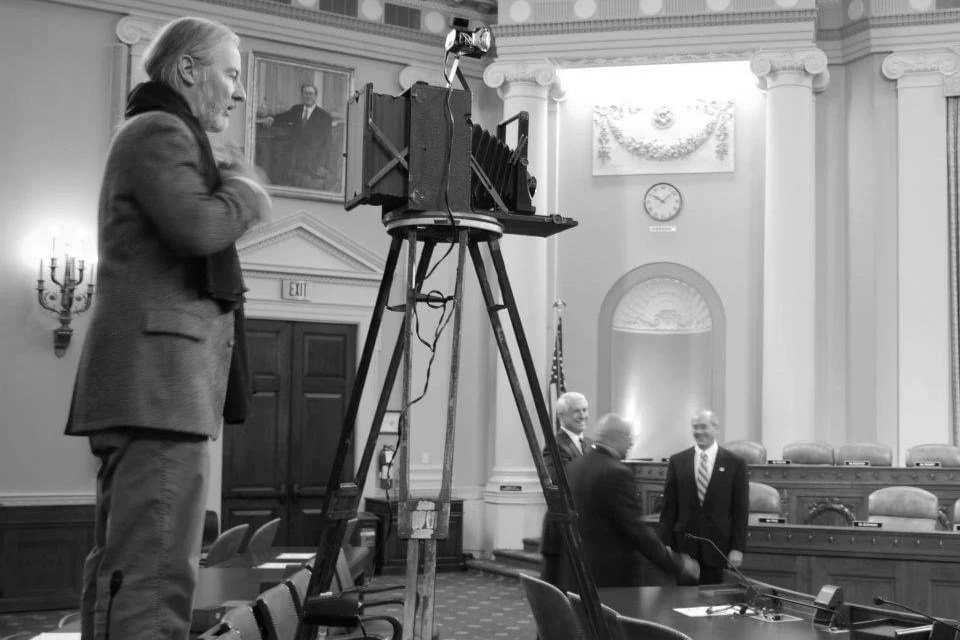
Doug Chadwick with his Cirkut Camera in the chamber of the U.S. House Ways and Means Committee, around 2010.
Inspired by that tradition, both Doug and Mark built their photographic careers making their own Cirkut panoramas and swapping ideas, tips, and tricks over the decades. For nearly 40 years, Doug traveled the country with his Cirkut photographing legislatures, political conventions, car clubs, reunions, as well as landscapes around his home county.
In 2016, Doug approached me about taking on some of his traveling panoramic assignments. I shadowed him photographing the Ohio Senate, and back at his home near Hillsboro, West Virginia, he showed me his darkroom setup —a long sink, a home-built contact printer, and a roller transport processor, as well as an Epson scanner and printer as he gradually moved toward a digital workflow. But with young children and a demanding job as marketing director at a historic theatre, I soon realized I couldn’t make the travel work to take on Doug’s panoramic shoots.
When Doug passed away suddenly in January 2023, it felt like a door had closed for good. But that spring, Mark contacted me: would I be interested in Doug’s workhorse No. 10 Cirkut? I was floored. Mark shared that Doug had purchased the camera in the early 1980s in New York. While the two of them had well over a dozen Cirkuts over the years, Mark noted that Doug’s No. 10 was one of the best running and one of only a handful that could be relied upon for jobs. The camera’s serial number of 117810 places its date of manufacture around 1921. To inherit such a camera felt like both an honor and a responsibility. On his porch in Morgantown, Mark walked me through the basics and sent me home with a box of spools, leaders, and expired aerial film.
Film—and what to do about it—was the first of many rabbit holes.
Film for the Cirkut
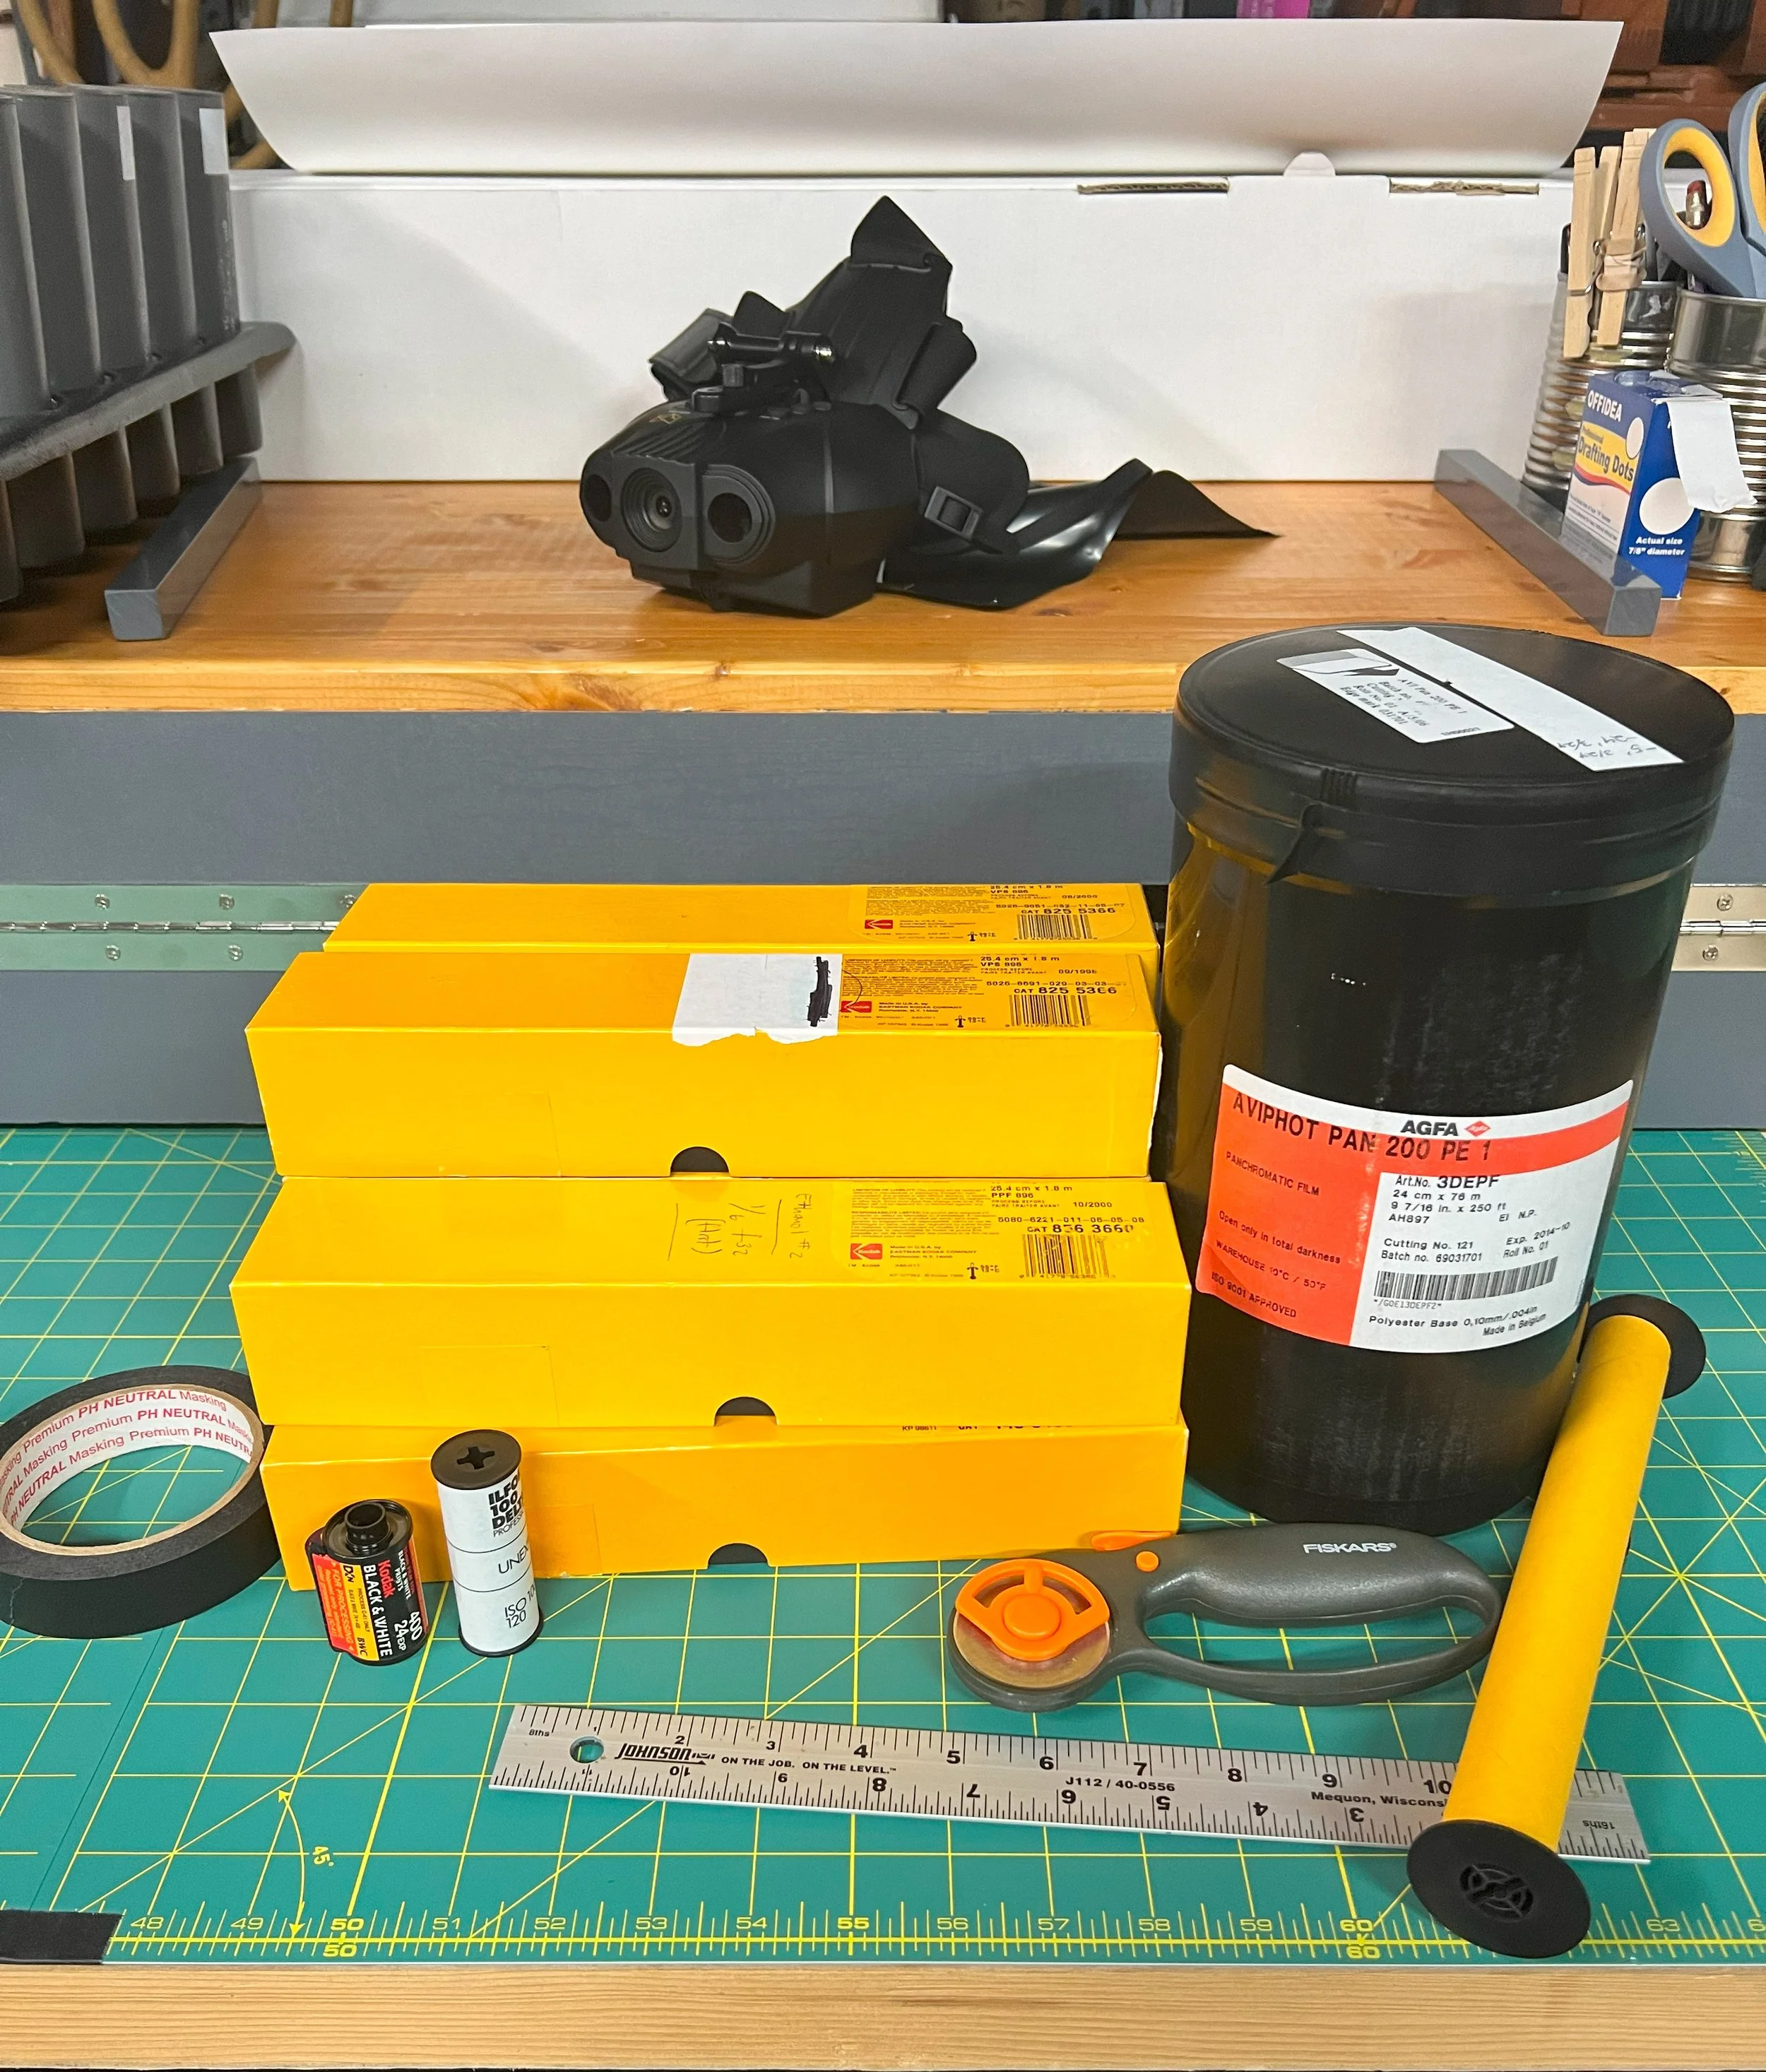
Rolling my own Cirkut film in 2026. Using the infrared goggles at the top, I cut and spool Agfa Aviphot Pan 200 aerial film (expired 2014) onto modified original Kodak Cirkut spools and leaders. A 35mm and 120 roll of film are shown for scale. One 6-foot long roll of No. 10 Cirkut film is the equivalent to 9 rolls of 35mm or 120. Kodak stopped offering Cirkut film special orders around 2011.
Kodak produced Cirkut film for more than a century before ending production around 2011. In 2025, you have only a handful of options, and none are straightforward.
Fresh film: Ilford offers new film in Cirkut sizes through its annual Ultra-Large Format sale: 100-foot rolls of 10-inch FP4 and 8-inch HP5. But these rolls are getting prohibitively expensive. By 2025, the cost of a single roll has crested $1,000. I was fortunate to buy into a 2024 order for HP5, but I tend to reserve it for low-light situations. I’ve recently heard good things about Astrum, a film manufacturer based in Ukraine, but I don’t have any direct experience ordering from them.
Expired aerial film. The most affordable and available option is aerial film, which was produced in roll 9.5 inches wide and 250–500 feet long. Kodak produced Plus-X, Tri-X, Super-XX, Panatomic-X, and others. These emulsions differ significantly from their pictorial namesakes: aerial ASA ratings are calculated differently, contrast is higher, and sensitivity often extends into the near infrared—useful for photographing through haze from an airplane. A 30-year-old roll of Tri-X I was given is heavily fogged but still usable for tests when developed in Dektol. More promising are 20-year-old rolls of aerial Plus-X.
Agfa Aviphot Pan 200. The most promising aerial stock I’ve found is Agfa Aviphot Pan 200. The film has been rebadged under various names (Rollei Superpan, CatLabs 320, JCH Street Pan, etc.). Expired rolls of Aviphot from 2012–2014 occasionally surface on eBay, and I’ve managed to secure a few. Rated around ISO 50 in my process, it produces clean negatives well-suited to alternative process contact printing. With an 89B filter, it even delivers striking infrared effects.
All of this film requires being loaded onto Cirkut spools and attaching the paper leader in complete darkness. A pair of infrared goggles is incredibly helpful on this front.
Developing

Processing a Cirkut negative in my homemade rotary processor, constructed from a six-foot length of 4” ABS pipe and fittings. It rolls on a wooden base fitted with pairs of casters on either end. With this method, I can develop a 10×72-inch negative with as little as 2 liters of developer and get very even development.
Even before exposing my first negative, my journalist instincts had me interviewing veteran Cirkut photographers about their darkroom methods. Some stood in total darkness and tray-developed or see-sawed film through dishpans holding a couple gallons of chemistry. A few modified 70mm reels to fit Jobo tanks.
The method that caught my attention and appealed to my work style, however, was to develop the film lengthwise in a piece of black ABS plumbing pipe. This method was practiced by just a couple of photographers I spoke with. Nevada-based large-format photographer Jim Galli describes the method in his posts on Photrio.com and largeformatphotography.info and Canadian photographer Christopher Creighton gave a detailed talk to the Photographic Historical Society of Canada in 2022. When I tracked him down after finding the YouTube video of his talk, he was eager to share about his experiences with Cirkut photography and his methods, and we continue to keep in touch. The ‘tube method’ appealed to me for a few reasons. First, this method makes the most economical use of developer without the need to hunt down a working Jobo processor. Dishpan and tray development take 8 liters of developer or more. With tube development, I could get by with as little as 1-2 liters, depending on the developer used. Secondly, like the Jobo method, it allowed for processing with the lights on, which you can’t do with open trays or dishpans.
So, to the hardware store I went to get pipe and fittings: a couple of threaded caps and inserts, plus a 45-degree elbow to facilitate filling and emptying the tube in its horizontal position. Using some scrap 1x6 lumber and two pairs of small casters, I cobbled together a roller base to cradle the tube. I also constructed a seven-foot wood sink lined with PVC shower pan liner to accommodate it.
After years of making tintypes but little else, re-entering the darkroom at this scale felt like a rediscovery. Pulling a six-foot negative from my homemade processor is an experience that never gets old.
Printing
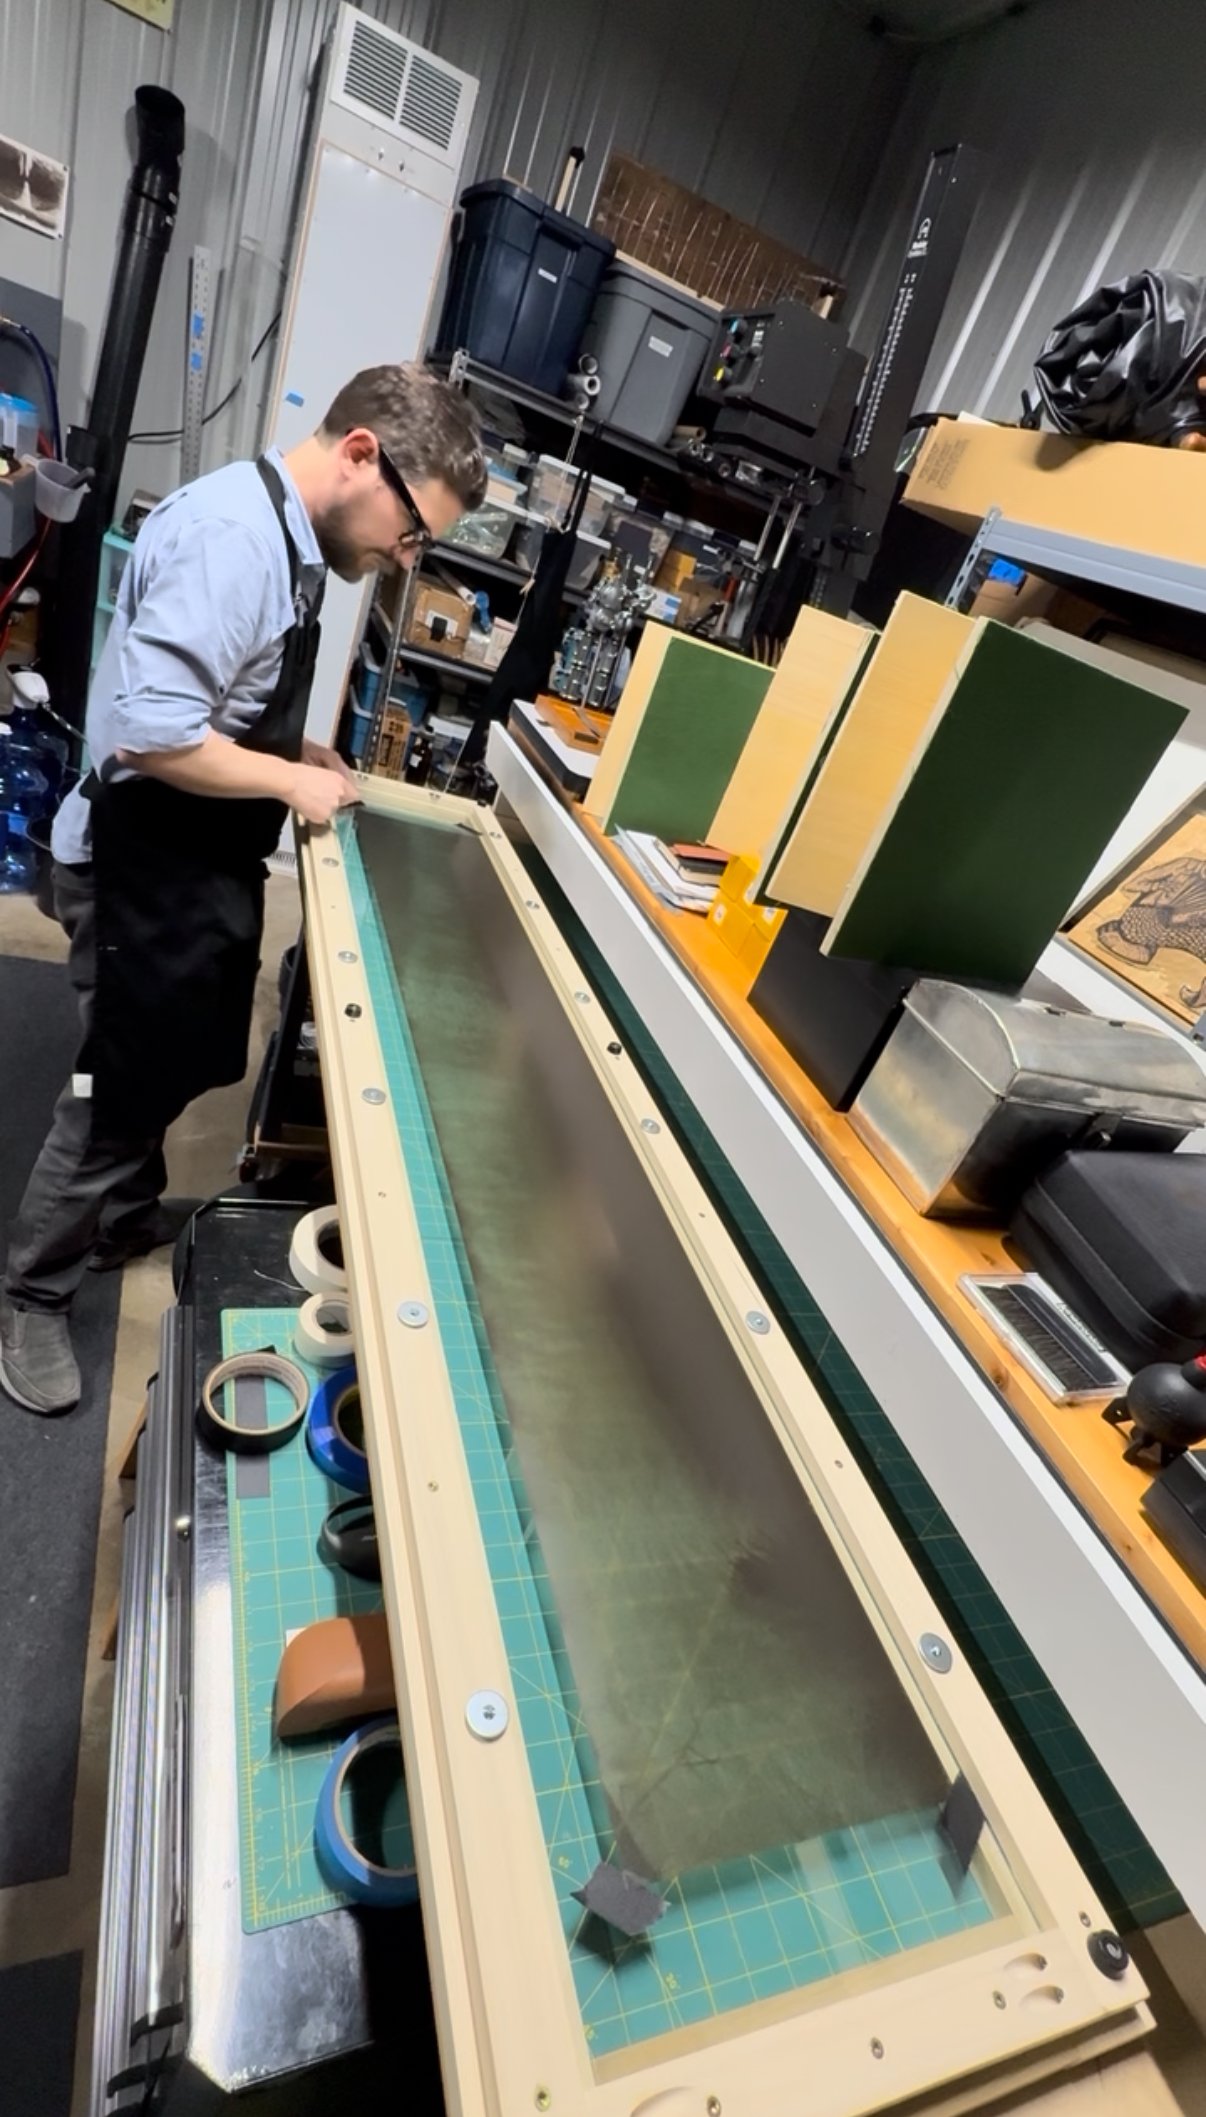
Preparing a negative in my six-foot contact printing frame. Once the paper is in place and the back is on the frame, the whole thing is flipped over, glass side up, and slid into the UV exposure unit. The tall white cabinet in the background is the homemade drying cabinet I use for negatives and prints.
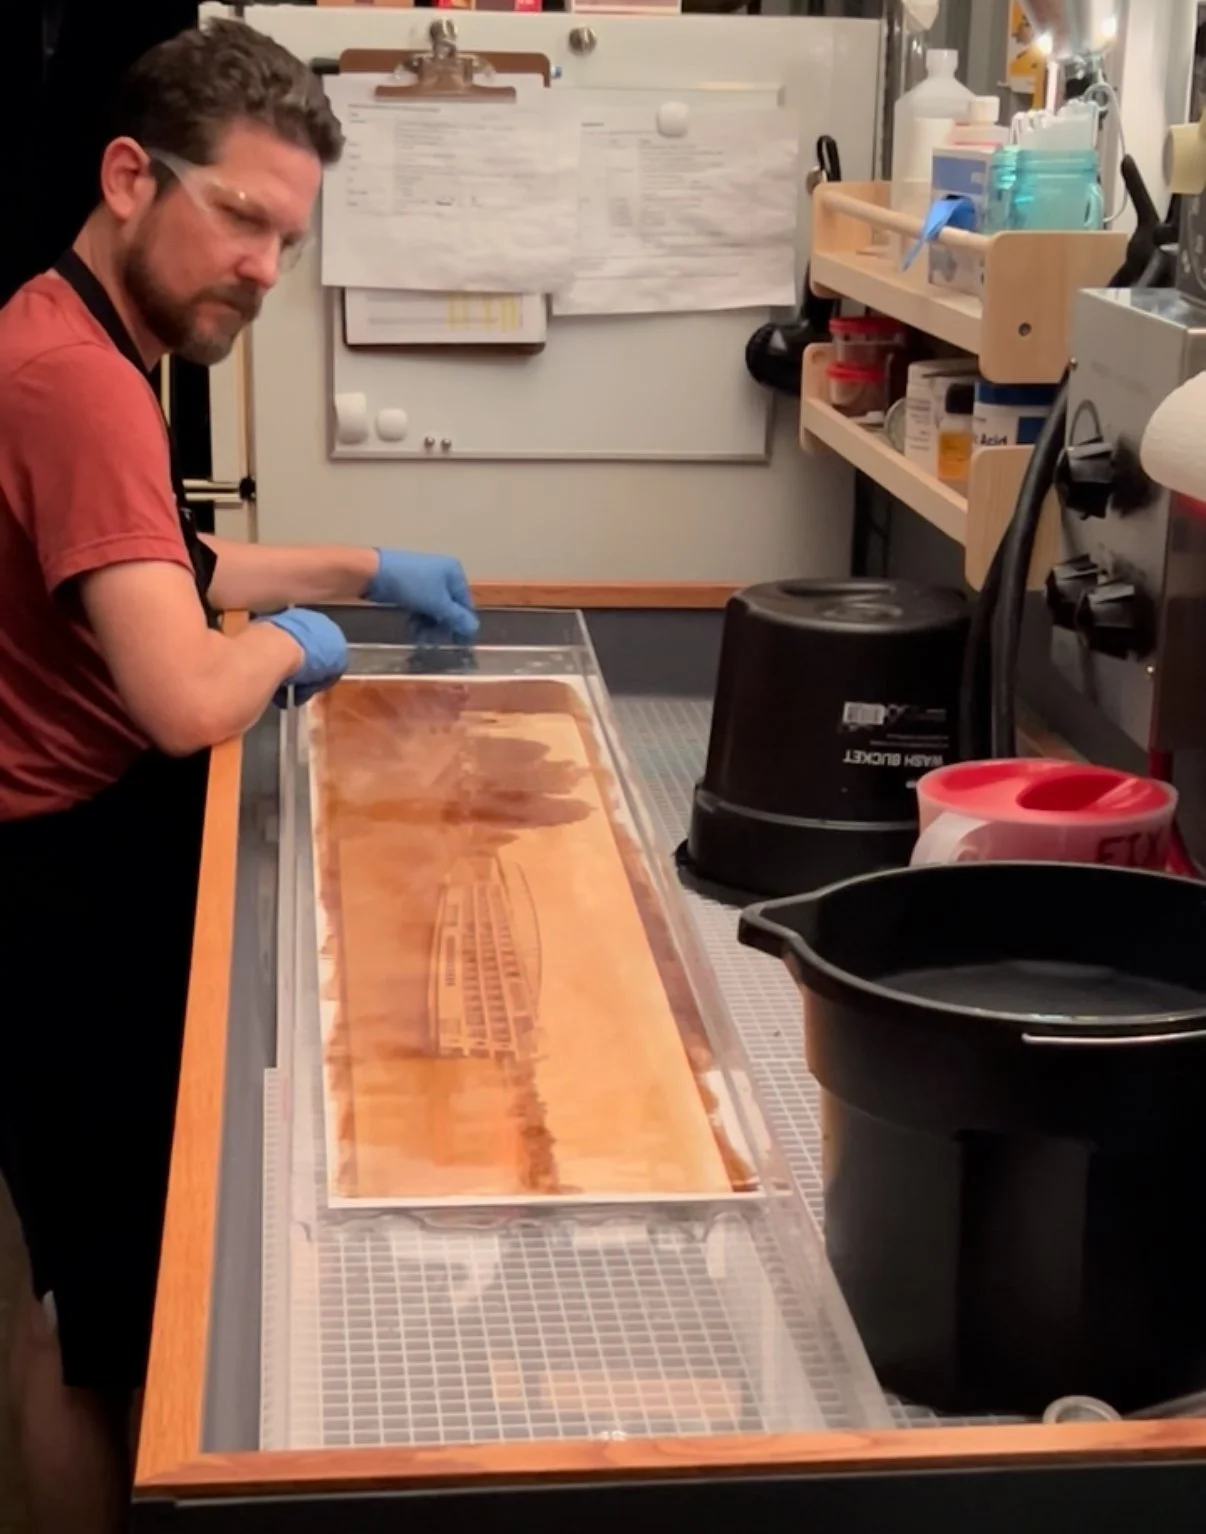
Rinsing a Vandyke Brown Cirkut print.
Printing is perhaps the most satisfying part of the process. Silver gelatin contact prints are possible, but mural paper is costly. Instead, I’ve gravitated to alternative processes like Vandyke Brown and Kallitype whose tonal qualities and historical resonance somehow feel right for Cirkut images in 2025.
This required another round of fabrication: 12×72-inch acrylic trays, a matching contact frame, and a custom UV LED light box. A six-foot contact print invites the viewer into the image differently than any smaller format. You don’t simply glance; you walk the length, scanning detail the way you’d take in a landscape in person. At times, the level of detail evokes the three-dimensional effect of a stereoscope.
Drying
Drying Cirkut film and prints presents its own challenges. Traditional drying cabinets are hard to find and generally aren’t tall enough. At first, I hung negatives from the garage door track, which was effective, but provided no protection from dust. Eventually I built a cabinet 14 inches square and six feet tall, framed in 2x2s and skinned with aluminum flashing. A HEPA-filtered fan circulates clean air, allowing negatives to dry dust-free and prints to dry flat in about an hour.
Storage
Archival storage is another puzzle. Conservators often struggle to flatten century-old Cirkut negatives stored rolled in their original boxes. Determined to avoid that fate, I ordered a roll of archival tissue paper and fashion sleeves for each negative. Both negatives and unframed prints now live in 14×60-inch barrier-board boxes from Gaylord Archival. Flat storage takes space, but it preserves the work and makes the subsequent work of printing and framing much more manageable.
Lenses & Gears
The Cirkut is as much machine as camera. Each focal length requires a gear set to synchronize film movement with the rotating body at a given focus distance. My No. 10 came with a generous assortment, but many Cirkut beginners must track down missing sets, commission 3D prints, or have gears machined.
A Turner-Reich triple convertible was standard on the Cirkut, but later process lenses are most often used by Cirkut photographers: Goerz Red Dot Artars, Schneider Repro-Clarons, Ilex Process Paragons, Kodak Copying Ektanons. These sharp lenses cover the format beautifully. My everyday choice is a 16.5-inch Repro-Claron; for reach I use a 24-inch Artar; for wide views, an 8.25-inch Dagor mounted in back of the lens board—the practical limit before the camera bed intrudes into the frame.
Framing
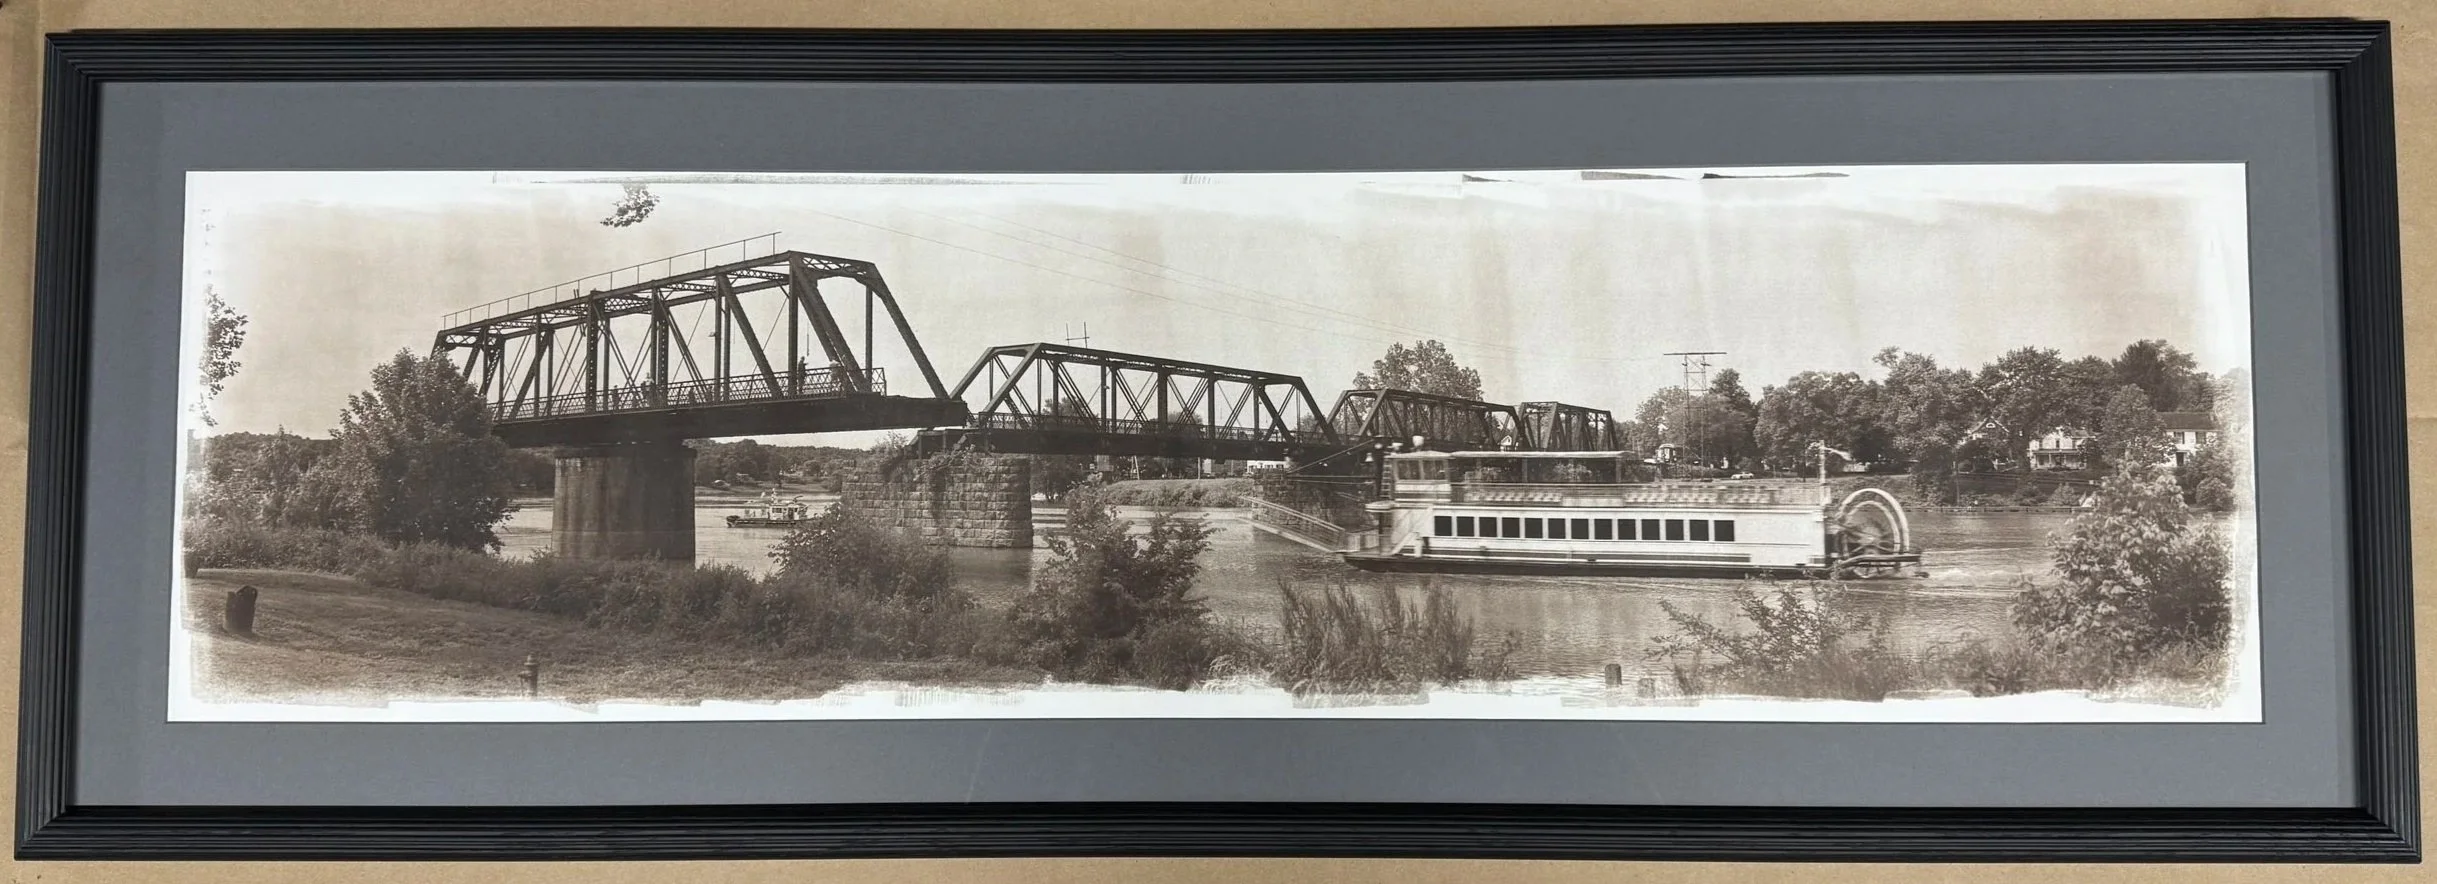
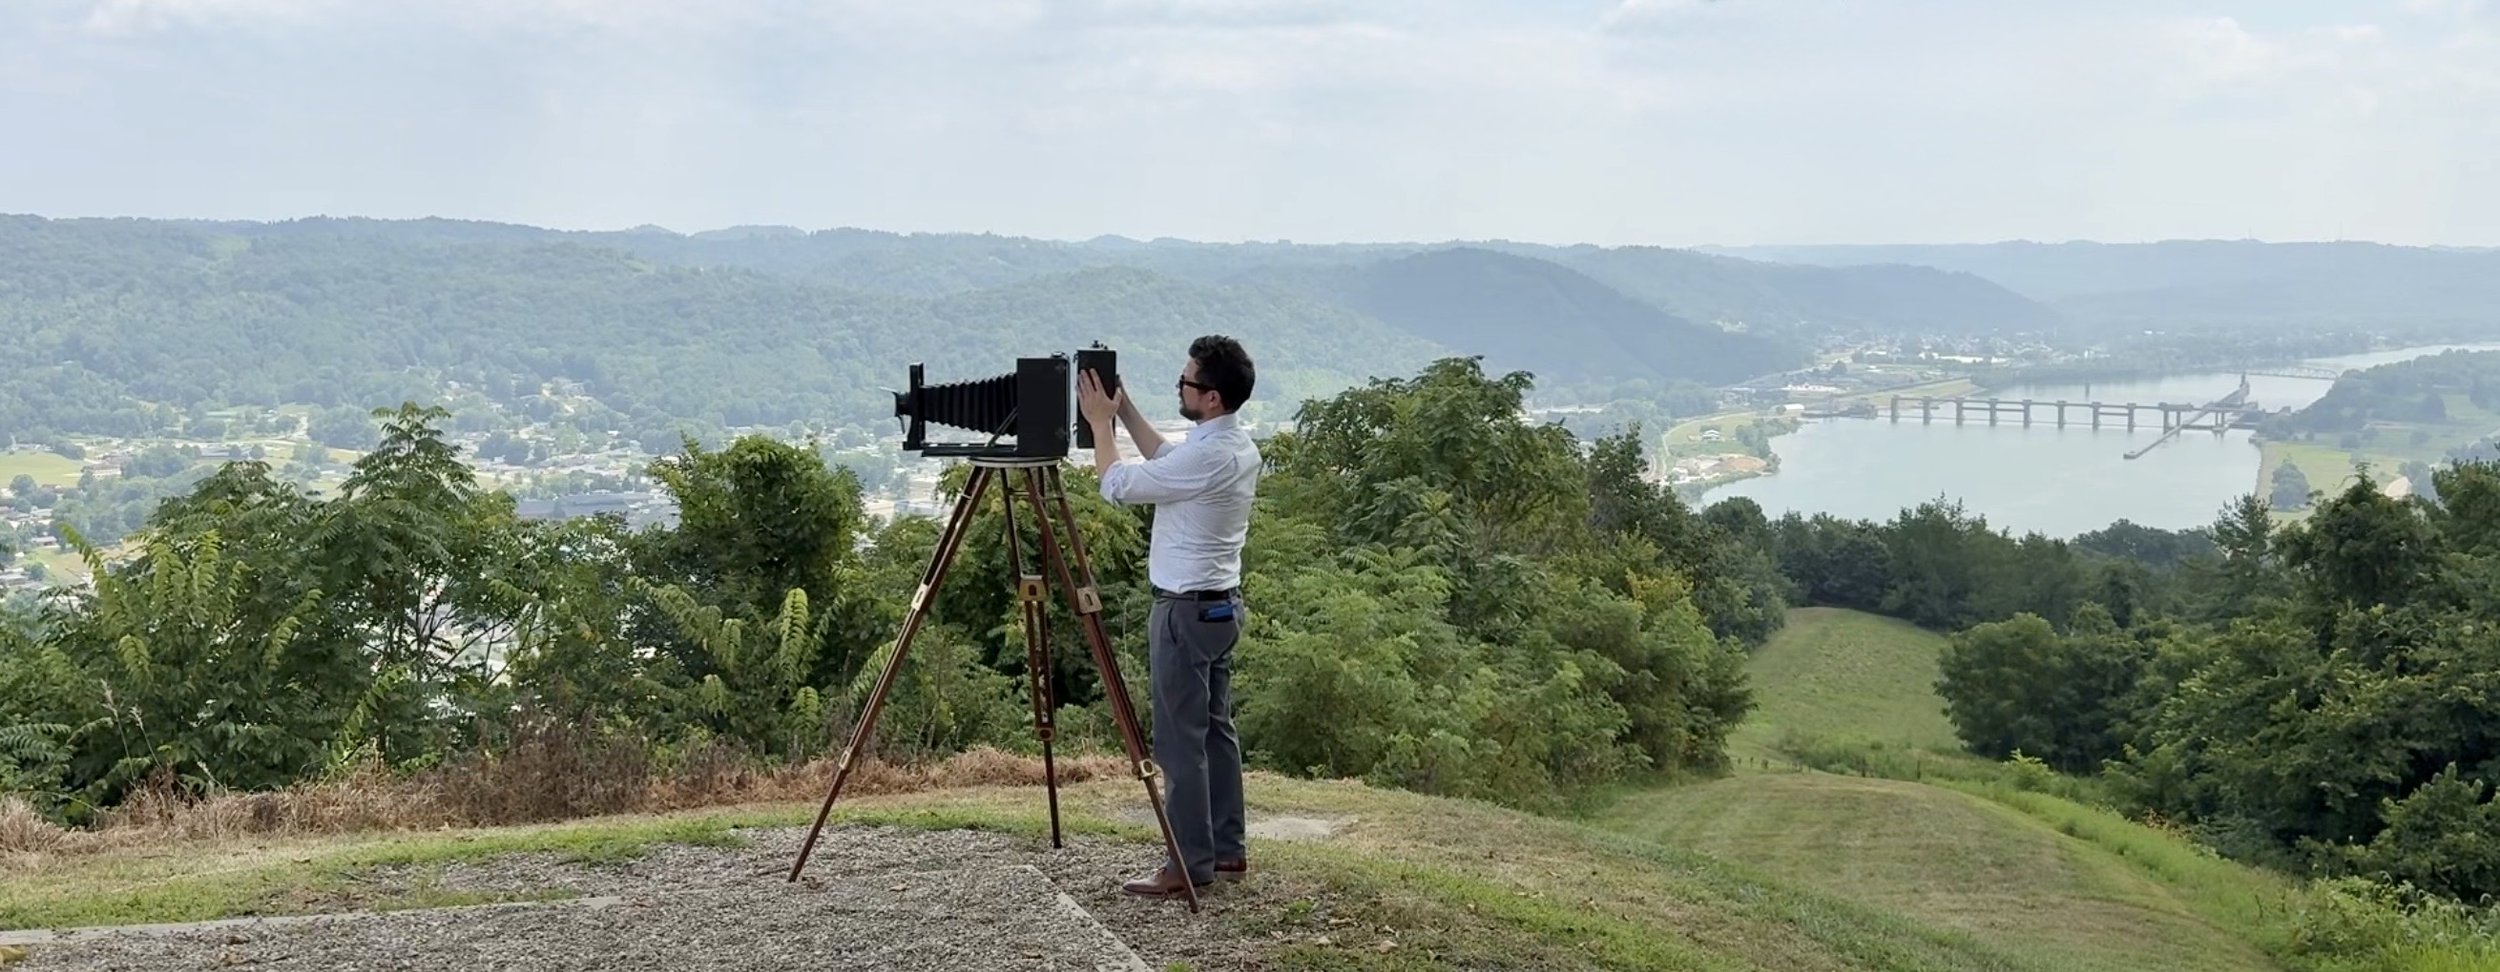
Framed Vandyke Brown print of Harmar Bridge & Valley Gem Sternwheeler, Marietta, 2025
Like the rest of the process, framing has become an extension of the work itself. There’s a continuity in moving from camera to negative to print to object, each step requiring its own set of decisions and compromises. The frames don’t aim to call attention to themselves, but quietly support the image with simple profiles, sturdy joinery, and materials that feel appropriate to the photograph’s scale and subject.
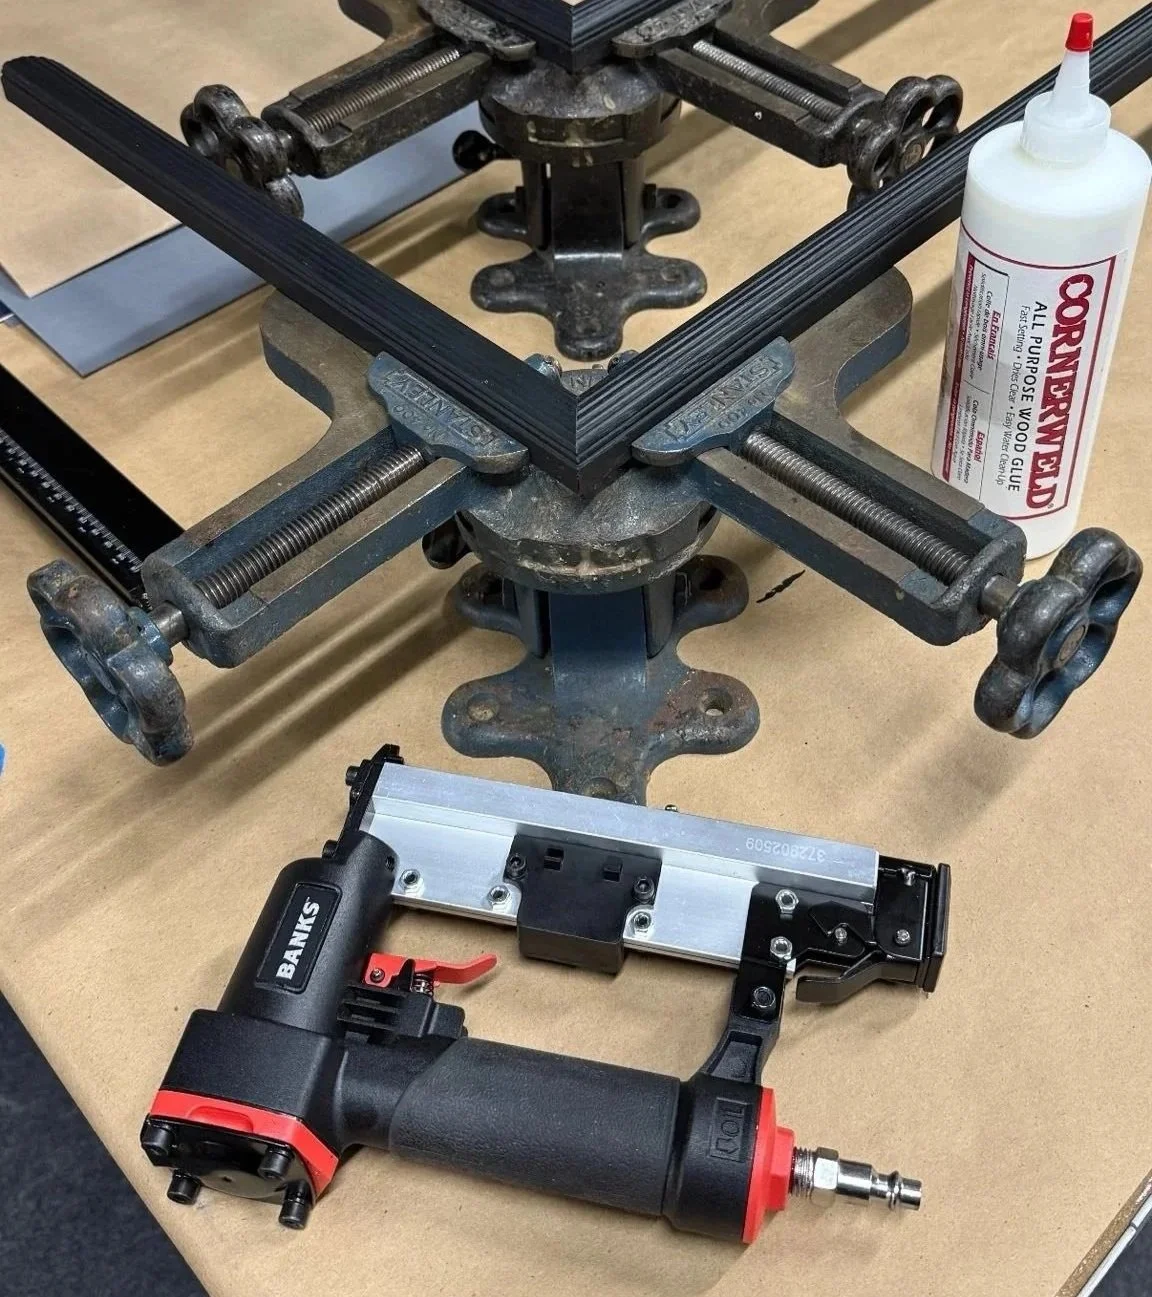
Gluing up a frame with a pin nailer and Cornerweld, in the firm grip of a pair of vintage Stanley No. 400 Miter Vises
There are also practical considerations at this size that quickly become part of the equation—materials storage, wall space, transport, and handling. A four- or six-foot framed print is not easily stored or moved, and even simple tasks like mounting or hanging require forethought. Those constraints have pushed me toward solutions that balance durability with manageability, keeping the work accessible rather than overly precious.
I’ve purchased frame stock from an out-of-business frame shop, and the local art center’s framing shop has generously helped me set up an account with their vendor so that I can have 40×60 mat board, foam core, and cut-to-size acrylic delivered alongside their regular Friday shipments.
Back in my shop, I’ve slowly acquired the tools necessary for basic framing: a couple of vintage Stanley No. 400 miter vises, a 60-inch mat cutter, and a new-old-stock Stanley No. 100 Miter Machine, which was a standard fixture in many framing shops until the mid-20th century. Like the camera and the printing, I’m leaning toward simpler methods for framing that are probably less state-of-the-art, but easy to manage in my home studio. The miter vises and miter machine pack away easily on a shelf. The result is a framing approach that mirrors the rest of the process—simple, deliberate, and built to support the image without getting in its way.
Parting Thoughts
Today, I’m enjoying being part of that legacy of panoramic photography and finding my own path with it. I’ve also discovered a small but very supportive circle of contemporary Cirkut panoramic photographers who are each working to preserve this format in their own unique ways. You can find several of us on the public Facebook group, “Cirkut and Panoram Cameras by Kodak.”
Photography with the Cirkut has reignited my love of film photography in a significant way. Every strip of film that winds through the camera connects me not only to Doug Chadwick and the lineage of Cirkut photographers, going back to Red Ribble and Eugene Goldbeck, but also to the engineers who perfected the camera, and to the communities and landscapes that have been captured in yard-long photographs over the past century. It continues to remind me why I was drawn to film photography in the first place.
I want to thank several Cirkut photographers who have helped me along my journey and generously shared their knowledge, including Mark Crabtree, Christopher Creighton, Euphus Ruth, Ron Klein, Jamie Young, Socialmocracy, Benjamin Porter, David Firman, and Jim Galli. Thanks also to B.J. Gudmundsson for sharing more of Doug’s story and work with me. Several of these individuals have become friends I continue to stay in touch with.